Reconnecting with your CORE after childbirth: a practical guide
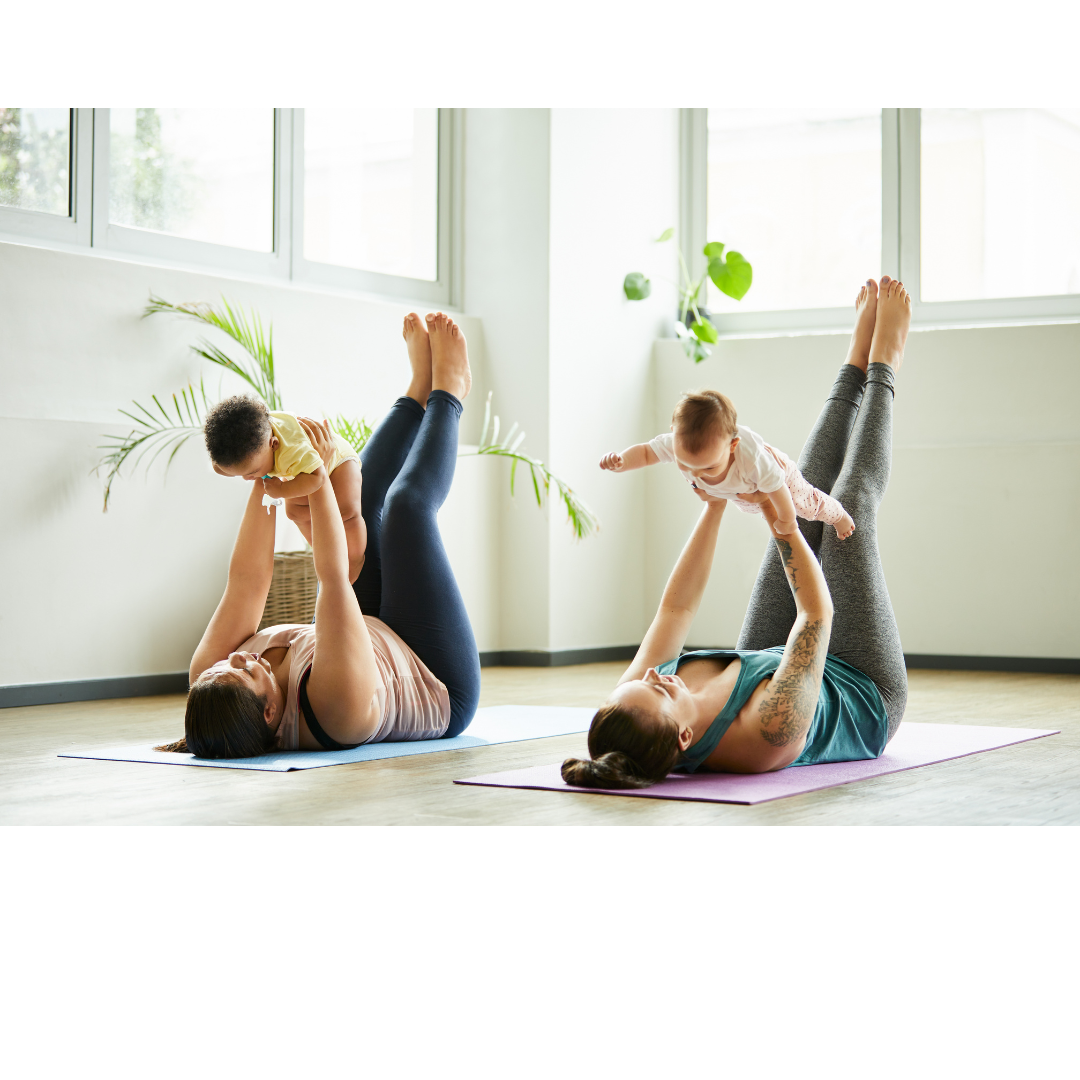
Posted on 21st October 2026 by Paul FrankhamPregnancy and birth place significant demands on your abdominal muscles, pelvic floor, diaphragm, and connective tissues. Your body has done something incredible, and now it’s time to reconnect with your core rather than trying to “strengthen” it straight away.
Your core recovery starts with improving the coordination and control of your muscles. Once your core muscles are working together effectively again, it’s smart to gradually increase the load.
What is your core?
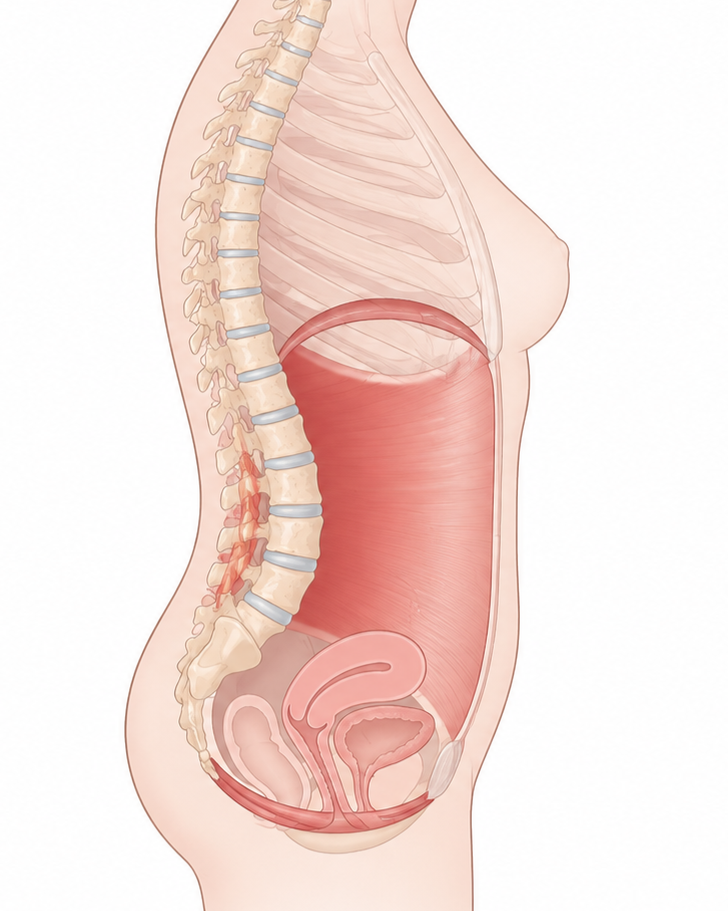
Think of your core as a cylinder. It includes:
- The diaphragm (your breathing muscle) at the top
- The abdominal muscles at the front and sides
- The pelvic floor muscles at the bottom
- The deep back muscles that support your spine
These muscles work together every time you breathe, move, lift your baby, cough or exercise. During pregnancy and birth, these muscles often become less coordinated because they’ve been under significant load. The goal isn’t to pull your tummy in tightly. Instead, we’re teaching these muscles to work together naturally again.
Reconnecting with your core postpartum:
After birth, your abdomen may feel:
- soft
- numb
- swollen
- disconnected
- tender
- unfamiliar
Spend a few minutes each day gently placing your hands on your abdomen. Massage around the tummy using gentle circular movements if it feels comfortable. This can help improve awareness, reduce sensitivity and encourage movement of the tissues.
If you’ve had a Caesarean birth, once your incision is fully healed (at around 6 weeks postpartum) and your healthcare team has cleared you, gentle scar massage can also improve mobility and comfort, reduce numbness, tension and pain.
Some women also feel more supported wearing a postpartum support garment or abdominal compression shorts, particularly in the first few weeks. It shouldn’t feel restrictive or make you hold your breath. Think of it as providing gentle support rather than doing the work for your muscles.
Finding your pelvic floor
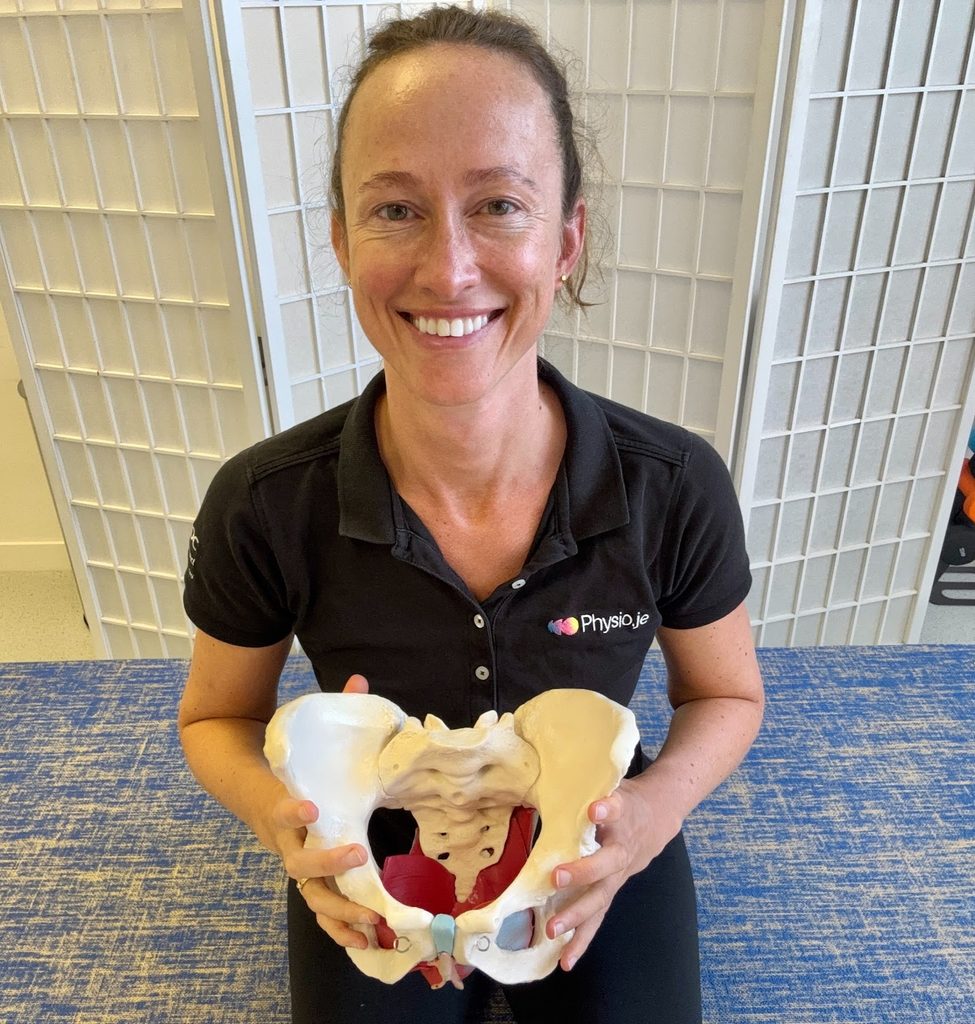
Your pelvic floor forms the base of your core. These muscles help you stay continent and support your bladder, bowel and vaginal walls.
To find your pelvic floor:
Lie down or sit comfortably. Breathe in to prepare. As you breathe out, imagine you are trying to stop yourself from passing wind while also stopping the flow of urine. Gently close and lift around your back passage, vaginal opening and urethral opening. Hold the contraction for up to 10 seconds, breathing normally throughout — don’t hold your breath. Relax your pelvic floor as you breathe in, then rest for 6–10 seconds before repeating. Aim for 10 repetitions 2-3 times a day.
Try not to:
- Hold your breath.
- Squeeze your buttocks.
- Grip your thighs.
- Pull your tummy in.
Important: Do not practise pelvic floor contractions while you are passing urine or stool on the toilet.
For more information and a structured pelvic floor muscle training programme, have a look at the Squeezy NHS Pelvic Floor Exercise App.
If you’re unsure whether you’re activating your pelvic floor muscles correctly, or you experience pain, heaviness, leaking or difficulty finding the muscles, seeing a pelvic health physiotherapist is highly recommended. You can self-refer to a private pelvic health physiotherapist through Physio.je or see a hospital pelvic health team.
Connecting Your Breath and Core
Your diaphragm forms the top of your core cylinder, while your pelvic floor forms the bottom. The two work together, moving in sync to help regulate pressure within your core. Practice this exercise:
As you breathe in:
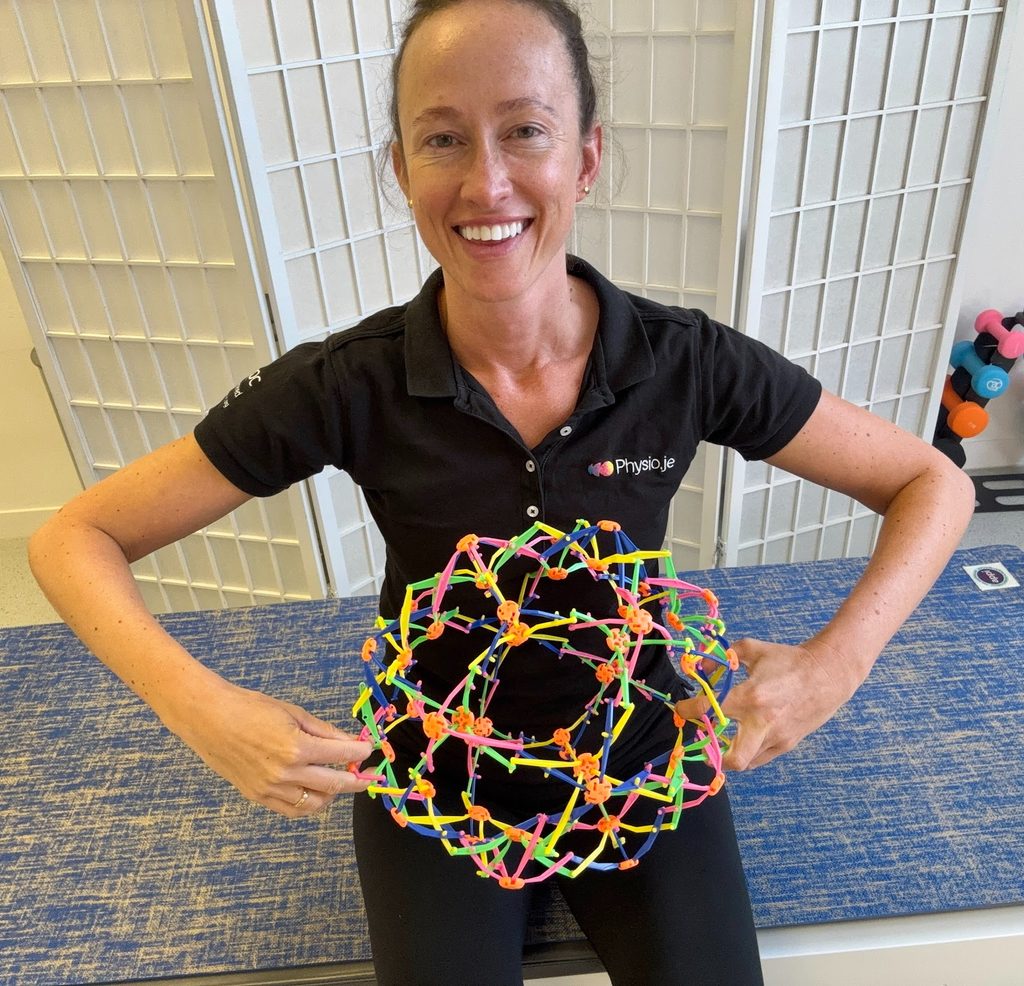
- Gently expand your ribs sideways.
- Allow your pelvic floor and tummy to relax.
As you breathe out:
- Gently contract your pelvic floor muscles.
- Draw your lower tummy gently in towards your spine.
- Allow your ribs to soften.
Coordinating your core with movement
Once connecting your core and breath feels comfortable, begin adding gentle movements. The aim is to breathe out during the effort while gently activating your pelvic floor and lower tummy. If you experience any pain or other symptoms during or after exercise, please consult your GP.
Chest Lift (Mini Curl-Up)
Lie on your back with your knees bent and your feet resting on the mat. Support your head with your hands.
Breathe in to prepare. As you breathe out:
- Gently contract your pelvic floor by imagining you are “closing” your back passage and vaginal opening.
- Gently draw your lower tummy in towards your spine.
- Lift your head and shoulders slightly, bringing your ribs towards your pelvis.
- Keep breathing out as you lift.
- Inhale as you slowly lower back down and relax.
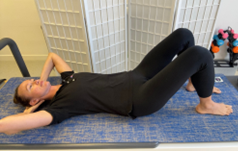
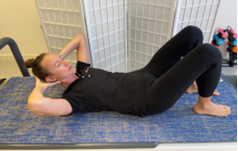
Important: Look at your tummy as you perform the exercise and check for coning or bulging. If you notice the midline of your tummy popping up into a dome, or your whole tummy bulging out rather than shortening evenly, take a step back.
Return to the previous section on connecting your breathing and core and focus on achieving an even, gentle abdominal contraction. Once you can do this comfortably, add a tiny head lift, maintaining the same level of tummy and pelvic floor activation.
Keep breathing out as you lift — don’t hold your breath.
Once you have mastered this stage, gradually progress to lifting your head and shoulders, while maintaining the same controlled breathing and even abdominal activation.
Oblique Curl-Up
The oblique curl-up builds on the same breathing and core control you practised in the previous exercises. It adds a gentle rotation to involve the muscles at the sides of your abdomen. Lie on your back with your knees bent and your feet resting on the mat. Support your head with your hands.
Breathe in to prepare. As you breathe out:
- Gently contract your pelvic floor by imagining you are “closing” your back passage and vaginal opening.
- Gently draw your lower tummy in towards your spine, keeping the tension even across your abdomen.
- Lift your head and shoulders slightly and stretch one hand towards the opposite knee.
- Keep the movement small and controlled, focusing on rotating through your upper body rather than pulling with your head or neck.
- Keep breathing out throughout the movement.
- Slowly lower back down as you breathe in and relax.
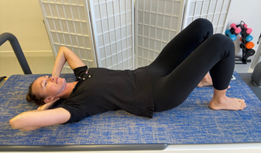
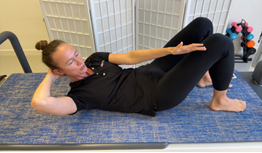
Practise the movement with a smaller range until you can maintain good control. As you get stronger, gradually increase the lift and rotation while maintaining steady breathing and even abdominal and pelvic floor activation.
Leg Lift
The leg lift builds on the breathing and core control. The aim is to move your leg while keeping your pelvis and core stable. Lie on your back with your knees bent and your feet resting on the mat. Place your arms alongside your body, resting on the mat.
Breathe in to prepare. As you breathe out:
- Gently contract your pelvic floor by imagining you are “closing” your back passage and vaginal opening.
- Gently draw your lower tummy in towards your spine.
- Keeping your pelvis and lower back still, lift one foot off the floor, bringing your hip and knee towards a 90-degree angle.
- Keep your pelvis level and avoid letting it tilt or rock from side to side.
- Slowly lower your foot back to the mat as you breathe in.
- Relax and repeat on the other side.
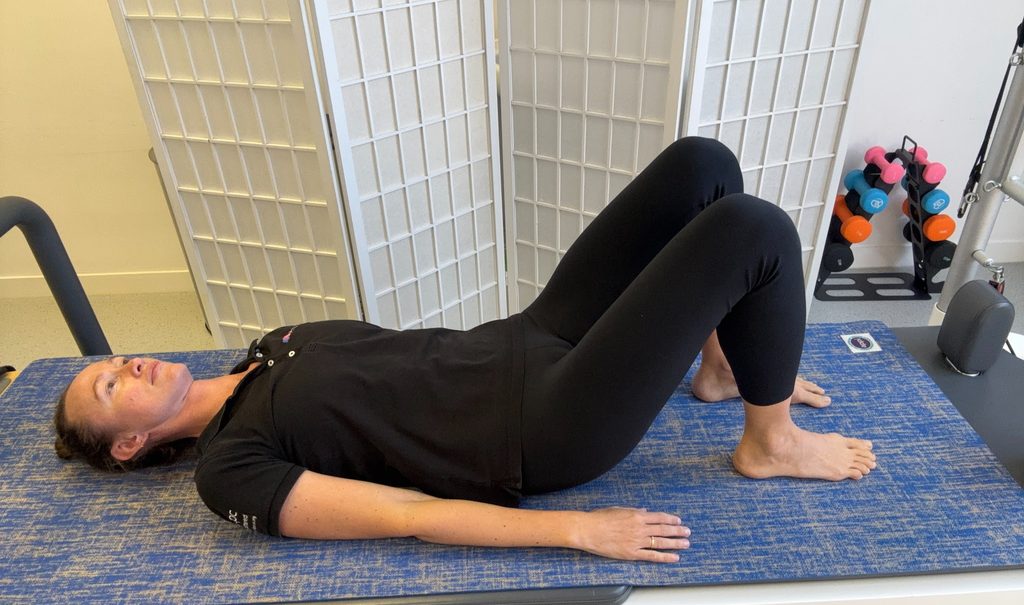
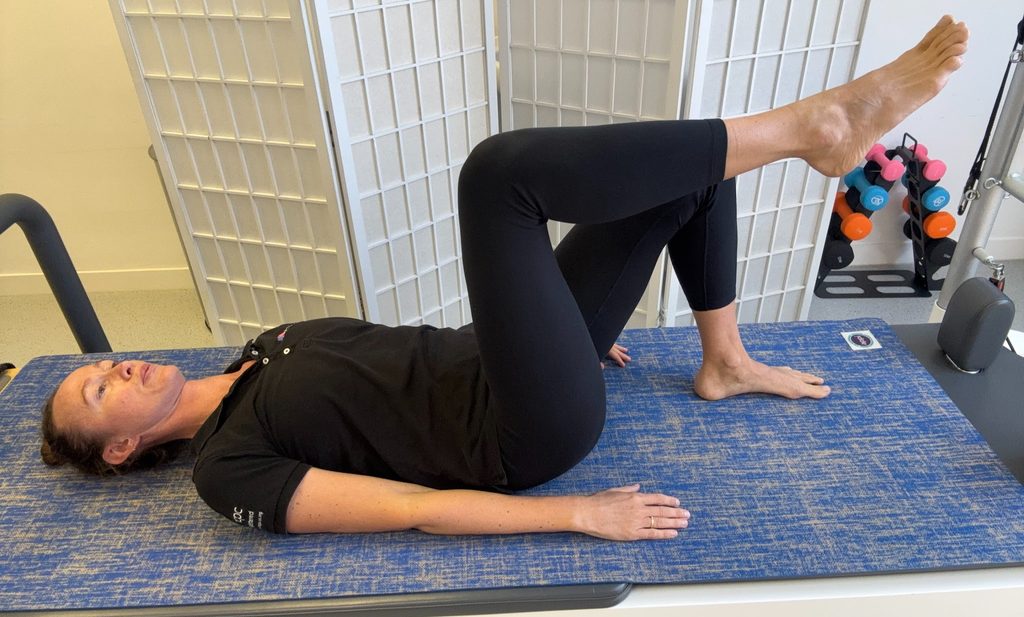
Important: Focus on keeping your pelvis and lower back still throughout the movement. If your pelvis starts to rock, your lower back lifts or arches, or your tummy begins to bulge or cone, make the movement smaller. Aim for slow, controlled movements rather than lifting your leg as high or as quickly as possible.
Leg Lower
This exercise builds on the breathing and core control you have practised in the previous exercises. The aim is to move your legs while keeping your pelvis, lower back and core stable. Lie on your back with your knees bent and your feet resting on the mat. Place your arms alongside your body, resting on the mat.
Breathe in to prepare. As you breathe out:
- Gently contract your pelvic floor by imagining you are “closing” your back passage and vaginal opening.
- Gently draw your lower tummy in towards your spine.
- Slowly lift both legs into tabletop position, with your hips and knees at approximately 90°.
- Keep your pelvis and lower back in a neutral position, without allowing your lower back to lift away from the mat. Avoid bulging or coning through your abdomen and maintain an even, gentle activation of your tummy and pelvic floor throughout the exercise.
- With your next breath out, slowly lower one foot towards the mat and gently tap your big toe down.
- Breathe in as you bring the leg back to the tabletop.
- Breathe out and repeat the movement with the other leg.
- Continue alternating legs for a few repetitions, keeping the movement slow and controlled. Avoid pelvic tilts.
- When you have finished, gently bring both feet back down onto the mat.
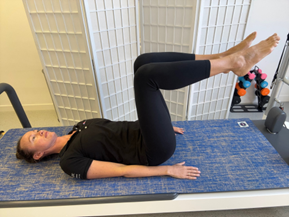
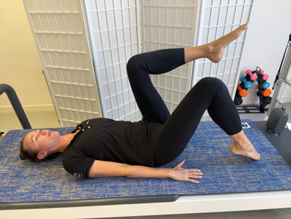
If this exercise feels too difficult and you struggle to maintain a firm but controlled core activation and neutral spine, try one of these options:
- Go back to the Leg Lift exercise.
- Bring your knees slightly closer towards your chest while keeping your legs on the tabletop.
- Reduce the number of repetitions.
Pallof Press
Stand side-on to the door with your feet hip-width apart and your knees soft. Attach the elastic band securely to the door handle and hold the band with both hands at your chest.
Breathe in to prepare. As you breathe out:
- Gently contract your pelvic floor by imagining you are “closing” your back passage and vaginal opening.
- Gently draw your lower tummy in towards your spine.
- Press the band straight out in front of you, keeping your hands at chest height.
- Keep your pelvis and trunk still as you press, resisting the pull of the band.
- Continue breathing out as you press — don’t hold your breath.
- Breathe in as you slowly bring your hands back towards your chest.
- Relax and repeat.
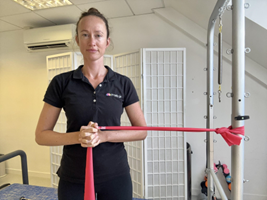
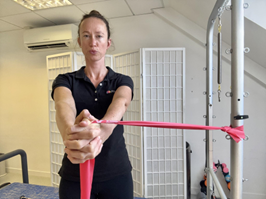
Important: Keep your body facing forwards throughout the exercise. Avoid rotating or leaning towards the door as you press the band away. Once you have completed your repetitions, turn around and repeat on the other side. Quality is more important than effort.
During every exercise:
✓ Keep breathing.
✓Think “gentle tension” rather than maximum effort.
✓ Stop if you notice pain, heaviness or bulging through the middle of your abdomen or in your pelvic floor.
If you’ve had a perineal tear, it is common to experience soreness and swelling initially.
Begin with:
- gentle breathing
- comfortable positioning
- very gentle pelvic floor contractions if comfortable
Avoid forcing strong squeezes if they increase pain. Contact your healthcare provider if you experience:
- increasing pain
- wound breakdown
- unusual discharge
- signs of infection
- ongoing bowel or bladder problems
Recovery from third- or fourth-degree tears requires individual guidance.
If you’ve had a Caesarean birth. Support your abdomen with your hands or a pillow when coughing, laughing or sneezing. Avoid heavy lifting until advised by your healthcare provider. Work on breathing and abdominal awareness. Once your incision is healed, begin a gentle scar massage. Gradually rebuild strength.
When to seek help. Please see a pelvic health physiotherapist if you experience:
- urinary or bowel leakage
- pelvic heaviness or a vaginal bulge
- persistent abdominal doming or bulging
- ongoing pain
- difficulty finding your pelvic floor
- uncertainty about returning to exercise
Summary
- Gentle touch or massage around your tummy to reconnect with the abdominal area.
- Find and start training your pelvic floor muscles.
- Learn how to coordinate breathing with core activation.
- Progress to simple core exercises, focusing on controlled activation and breathing.
Every postpartum recovery is different. Progress at your own pace and remember that rebuilding coordination is the foundation for long-term strength and confidence.